


 Like
Like Share
Share
 Report
Summary
Connectors are used throughout Power Platform Pillars such as Microsoft Power Automate and Microsoft Power Apps. They are also used in Azure services such as Azure Logic Apps. Connectors are a wrapper around first and third party APIs to provide a way for services to talk to each other. They represent the glue between services, allowing users to setup Connections to connect various accounts together. These connectors encompass a wide range of SaaS providers including Dynamics 365, Office 365, Dropbox, Salesforce and more.
This article will demonstrate how to build a custom connector for use with Power Automate and Power Apps Canvas Apps. This custom connector will attempt to build a connection to Azure Application Insights to assist Makers with sending messages during run time. We will discuss building and deploying an Azure Function and how to construct a Custom Connector. Finally we will discuss testing and supplying run time data from Power Automate.
Overview of Azure Function
Azure Functions provide a great way to build micro services including ones to help surface run time data from Power Automate Flow or Model Driven Application Plug-in tracing. Azure Functions can be written using .NET Core and included is native integration with Azure Application Insights. Alternatively, we can import the Azure Application Insights SDK to provide a streamlined approach to delivering messages. This article will focus on using the HTTP entry point and Azure Application Insights SDK to deliver messages to Application Insights.
Overview of Custom Connectors
Custom Connectors allow developers to supply custom actions and triggers that can be used by Microsoft Power Automate and Microsoft Power Apps. These connectors provide a reusable no or low code approach to integrating with an Application Programmable Interface otherwise known as an API. The complexity of interacting and implementing a connection and call to the API is hidden from makers, allowing focus on finding a solution to whatever business objective is at hand.
The custom connector can be thought of as a solution to a no cliffs approach to empowering makers. If a connector doesn't exist for your particular need, for instance an in house API, a custom connector can be used to bridge the gap. No longer are we having to build and send HTTP requests or manage connection flows as the connector will fill the gap.
For additional information, including considerations for Solution Aware Custom Connectors allowing for migration between environments, refer to the article
Overview of the Open API Specification
built on the desire and need to standardize how we describe API endpoints. Built from Swagger, the Open API dictates how an API should be used. Everything from security to required fields are detailed allowing integrators to focus on developing and not chasing down API specs. One great feature is the ability to design a specification first without relying on code being written. This allows Makers to define what they are looking for with Custom Connectors.
This specification is used by Power Platform Custom Connectors to build out the various triggers and actions that will be made available. This will be covered in more detail in the Building a Custom Connector section.
For more information regarding Open API please .
Building the Azure Function
The section below will document the steps I took to create the Azure Application Insights Azure Function. There are several ways to build, frameworks to use, additional requirements to adhere to, etc that are not represented here. That said these steps should allow developers to create a proof of concept that can be used to learn and build from.
Creating the Visual Studio Project and Gathering Dependencies
To build the Azure Function, I started with Visual Studio 2019 and created a new Azure Function project.
AUTHOR NOTE: CLICK EACH IMAGE TO ENLARGE FOR DETAIL
I chose a name and left everything else as the default values. From there I chose the HTTP trigger and .NET Core Framework v2 version for my Azure Function.
Once loaded I add the latest NuGet package for Azure Application Insights.
The goal with this Azure Function project is to avoid any additional dependencies and simply deliver messages to Azure Application Insights and return an object that could help me track messages. An image of the code I used is below. For the full Azure Function code, please refer to within the that includes all samples from the Monitoring the Power Platform series.
In the sample, I've embedded the custom connector definition described below and image within the solution file.
Testing and Deploying to Azure
For testing I typically use . Its a free application that is an industry standard for testing APIs. Also as noted, its in the documentation for crafting a specification for a Power Platform Custom Connector.
Once you've tested and are ready to to deploy, right click on the Azure Function project and choose Publish. For my example I published using the Zip Deploy mechanism.
Building the Custom Connector
The Custom Connector can be built by hand or using an Open API definition. For my connector, I defined and tested my Azure Function and deployed using Visual Studio. Once running, I was able to use Azure API Management to assist with defining the specification for use with custom connectors. The documentation points to using Postman as a primary tool for the specification, however I wanted to mention other techniques to achieve the same goal. To follow a step by step guide using Azure API Management, refer to the article .
Icon, Description, Host and Base URL
The first section of the wizard will expect the endpoint from your Azure Function App. The specific operations will be defined later but for now, insert the Host and "/api" if part of your Azure Function URL. In my Azure Function this looked like "<functionapp>.azurewebsites.net".
Next, the icon background color and image will need to be updated. I've noticed that the image will look skewed when used as an action but as a connection listed in a Power Automate Flow or Canvas App it looked ok.
Blue?...No thanks!
Security
The custom connector will need security defined which will be how we establish our connection, similar to other connectors. Many options exist, including OAuth 2.0 and Basic authentication, but for Azure Functions an API Key works well. Name the parameter "code" and set the location to "Query" as shown below.
The code will need to be standardized across functions or you may have to create multiple connections. A quick way to do this is to create a key for the host.
NOTE: Whatever this string is will be what is needed for the Custom Connector we will define below so I would suggest generating this yourself.
The Definition
The custom connector definition is where we begin to realize how our connector will be used within Power Automate flows. Each action will need to be defined within the "paths" section of the specification. Its important to point out here why the choice to use Azure Function helps here. By defining individual functions we can create actions that align directly with Azure Application Insights tables or to domain or workload specific actions. The example I'm using only shows that direct alignment but depending on the need an action can be invoked which from Azure Function can send multiple messages to various tables or even log stores (e.g. Azure Log Analytics).
Each action requires an operationId and response. Optional parameters include summary, description and parameters. Parameters define the fields in our custom connector action. Consider the following image, showing the Track Event action:
Now compare that to the definition of the specification:
Property Considerations
One item I ran into fairly early on was how to distinguish and work with json objects within other objects. Consider the scenario below:
{
    "correlationid":"testcorrelation",
    "name": "test app insight",
    "properties":
        {
            "user":"John",
            "userTwo":"Jane"
        }
}
My plan for this object was to take the properties shown above and add this to the customDimensions field within the customEvents table in Azure Application Insights. The issue I encountered was the data type of the field, thinking that I could use a serialized object as a string data type.
However the custom connector encoded this string resulting in a mismatch from what I was expecting in my Azure Function to what was actually delivered.
The expectation now was to reference the Open API or Swagger documentation to utilize the object or array data type to assist.
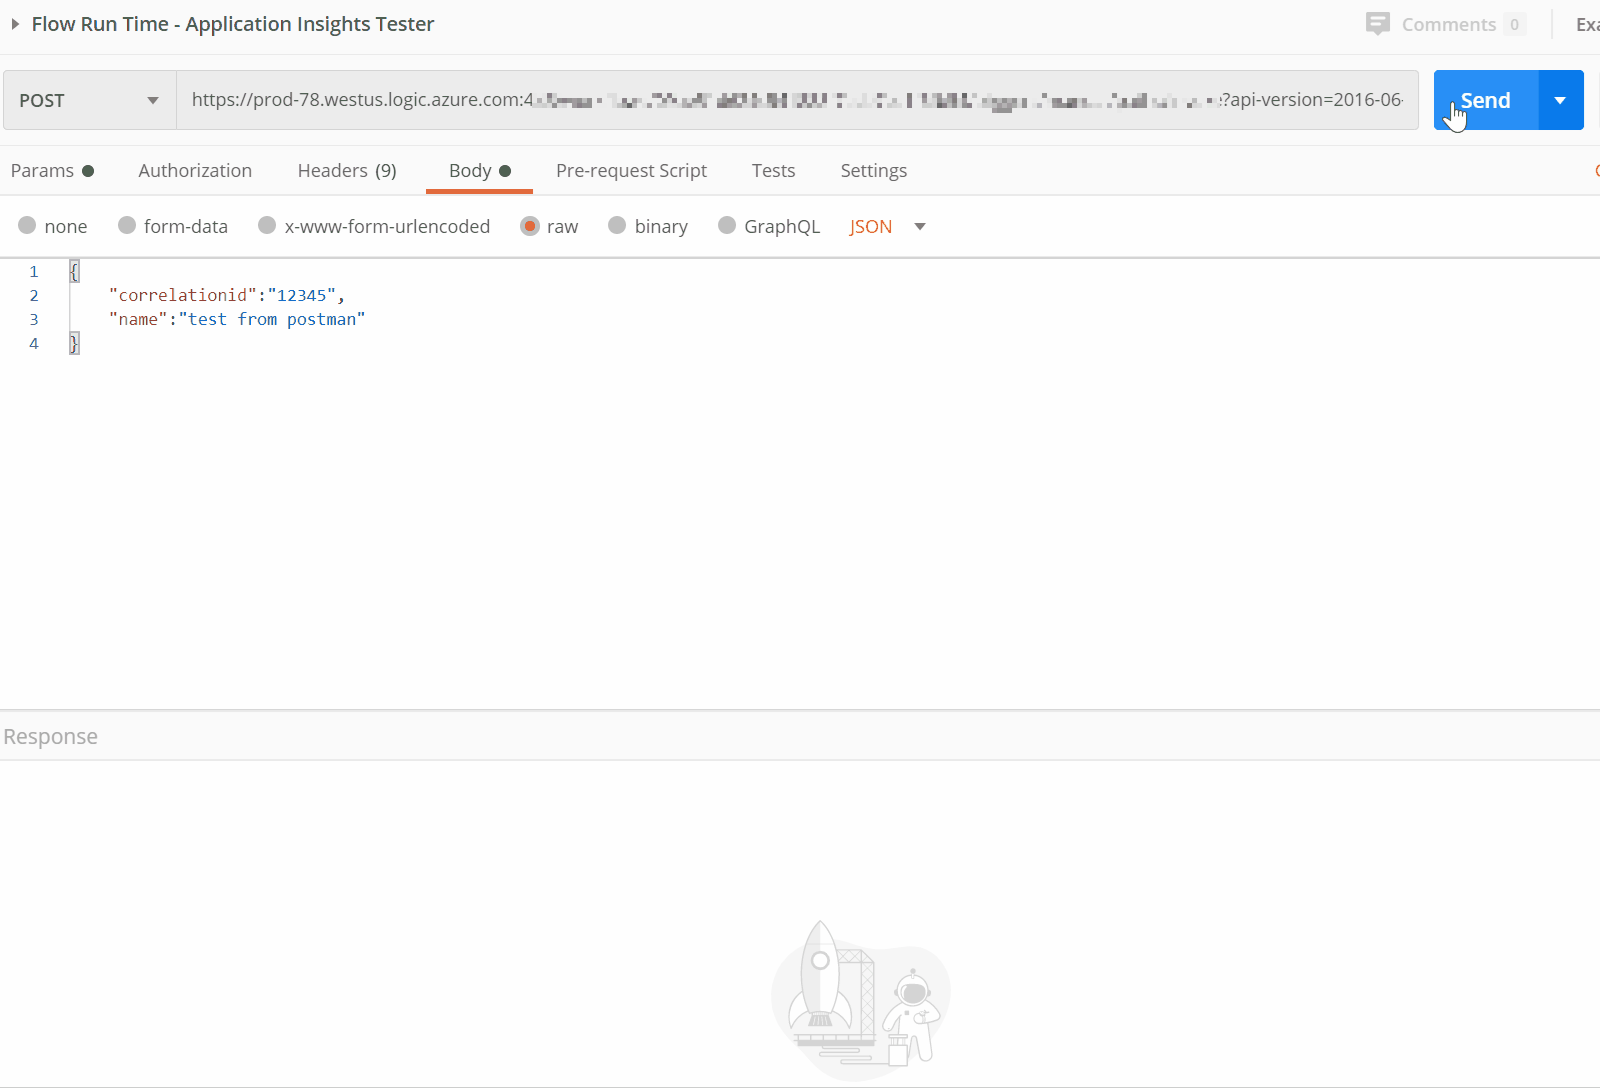
Testing the Custom Connector
The custom connector wizard includes a window for testing each operation. This is useful to see how the request properties are sent to the Azure Function from the custom connector and how the response looks. To begin, start by creating and testing a connection.
Next, choose an operation and fill out the properties defined in the Open API specification. When ready, click the Test operation button. A nice additional feature here is that is generates a cURL command that can be used locally.
The request and response will be shown from the operation. Here is where we can continually refine the custom connector specification to provide the correct data types to the Azure Function.
Using the Custom Connector
Once the Custom Connector has been created it can be used within Power Automate Flows or Power Apps Canvas Apps. I would assume this also applies to Azure Logic Apps. Below is an example using Track Event. In this example I'm including the correlationId that I passed from my originating request as well as the name property. I'm also using workflow, trigger and action objects detailed in the article .
To wrap, here is a gif showing an example run of the Application Insights Tester Power Automate Flow. The .
Next Steps
In this article we have discussed how to build and deploy an Azure Function to help deliver messages to Azure Application Insights. We then created a custom connector to allow Makers the ability to interact with our Azure Function like any other connector.
Continuing down this path we can use this approach for extending other logging APIs such as Azure Log Analytics. We can even extend the Common Data Service connector if needed. Be mindful however, of the nuances between the Open API specification and what Custom Connector requires.
In previous articles, . We have also discussed . Using the connector above, we can now send specific results from our scoped actions to Azure Application Insights allowing for proactive monitoring and action.
If you are interested in learning more about , which includes a , please contact your Technical Account Manager or Microsoft representative for further details.
Your feedback is extremely valuable so please leave a comment below and I'll be happy to help where I can! Also, if you find any inconsistencies, omissions or have suggestions, .
Index
*This post is locked for comments