


 6,120
6,120 Like
Like Share
Share
 Report
As a Microsoft Dynamics CRM developer some times you need to work with Email Templates. Basically email templates save time when creating multiple email messages. Email templates contain pre defined data of CRM records, so we don’t have to reenter the same information again. Specifying dynamic values from out of the box entities is pretty simple but there are some instances when we might want to add dynamic values from custom entities. To which we don’t have any straight forward approach in CRM as we cannot add custom entity in email template.
So here is the requirement:
Send an email upon successful creation of Patient record using email template.
Registration email should contain the following format and values from Patient Record.
Dear <Patient Name>,

Thank you for visiting our Hospital.
We would like to inform you that your registration is successful, Please find the details below

<Type : Single Line of Text>
Patient Name : <Name of the patient>
Patient ID : <Patient Business ID>

<Type : Lookup>
Hospital : <Hospital ID>
Doctor : <Patient ID>

<Type : Date Time>
Registration Date with Time: <Registration Date>
Date Of Birth with Time : <Date Of Birth>

<Type : Currency>
Treatment Cost : <Treatment Cost>

<Type : Decimal Number>
Consultation Fee : <Consultation Fee>

<Type : Floating Point Number>
Estimated Amount : <Estimated Amount>

<Type : Multi Line of Text>
Address : <Address >
Patient Details : <Patient Details>


<Type : Multi Select Option Set>
Symptoms : <Type : Option Set>

<Type : Option Set>
Gender : <Patient Gender>
Patient Status : <Patient Status>
Status :

<Type : Two Option set>
Hospitalization Required : <Hospitalization Required>
Show Patient Details : <Show Patient Details>

Best Regards,
Hospital Management.
Step – 1:
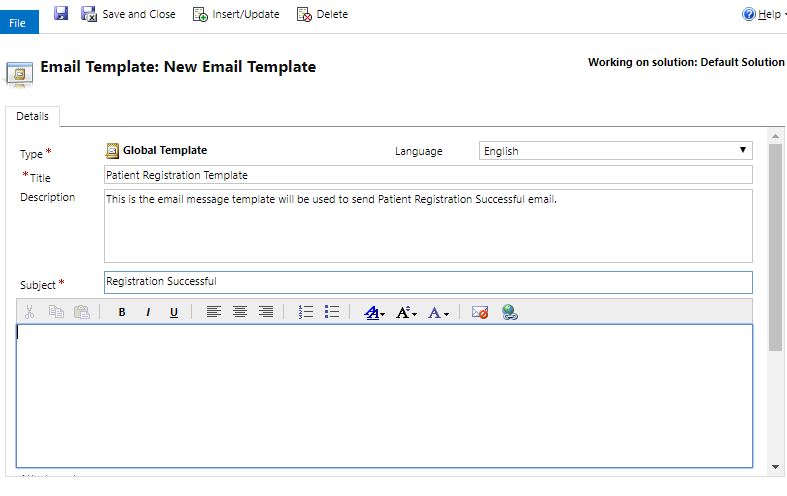
First create an Email Template of type “Global” by following below navigation Settings < Templates and then clicking Email templates and Click on ” New” button then Select Template Type “Global” and click on “OK”.

Give a proper name like “Patient Registration Template” as shown below
Step – 2:
The below table gives the syntax for inserting dynamic values from Custom entities
| S.No | Field Type | Syntax | Example |
| 1 | Single Line of Text | {!EntityLogicalName:FieldLogicalName;} | {!new_patient:new_patientname;} or {!new_patient:new_patientbusinessid;} |
| 2 | Lookup | {!EntityLogicalName:FieldLogicalName/@name;} | {!new_patient:new_hospitalid/@name;} or {!new_patient:new_doctorid/@name;} |
| 3 | Date | {!EntityLogicalName:FieldLogicalName/@date;} | {!new_patient:createdon/@date;} or {!new_patient:new_dateofbirth/@date;} |
| 4 | Time | {!EntityLogicalName:FieldLogicalName/@time;} | {!new_patient:createdon/@time;} or {!new_patient:new_dateofbirth/@time;} |
| 5 | Currency | {!EntityLogicalName:FieldLogicalName;} | {!new_patient:new_treatmentcost;} |
| 6 | Decimal Number | {!EntityLogicalName:FieldLogicalName;} | {!new_patient:new_consultationfee;} |
| 7 | Floating Number | {!EntityLogicalName:FieldLogicalName;} | {!new_patient:new_estimatedamount;} |
| 8 | Multiline of Text | {!EntityLogicalName:FieldLogicalName;} | {!new_patient:new_address;} or {!new_patient:new_patientdetails;} |
| 9 | Multi Select Option Set | {!EntityLogicalName:FieldLogicalName/@name;} | {!new_patient:new_symptoms/@name;} |
| 10 | Option Set | {!EntityLogicalName:FieldLogicalName/@name;} | {!new_patient:new_gender/@name;} |
| 11 | Two Options | {!EntityLogicalName:FieldLogicalName/@name;} | {!new_patient:new_hospitalizationrequired/@name;} or {!new_patient:new_showpatientdetails/@name;} |
Step – 3: Open the email template and place the required details in email body like below

Save the email template and you will see the updated email template like shown below

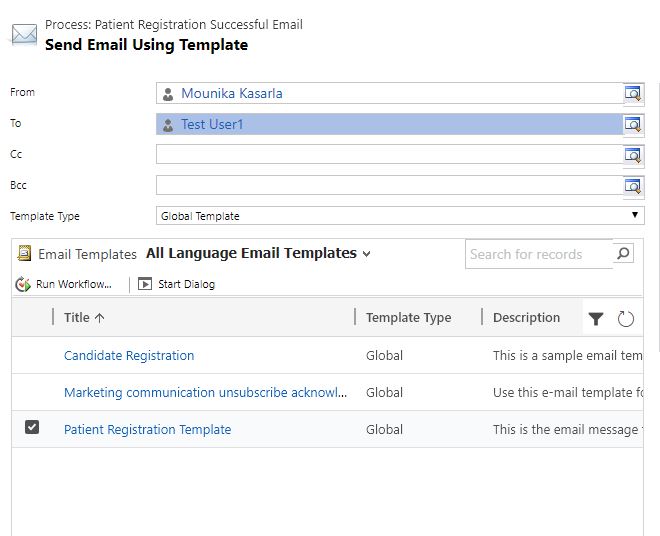
Step -4 : Create a workflow on Patient entity with create event and select the send the email step, associate the email template created above as shown below

Click on Set Properties and to see the below window and provide details in From/To and select “Patient Registration Email Template” and click on save and close and finally Activate the workflow
Step – 5: Create a patient record with relevant details as shown below

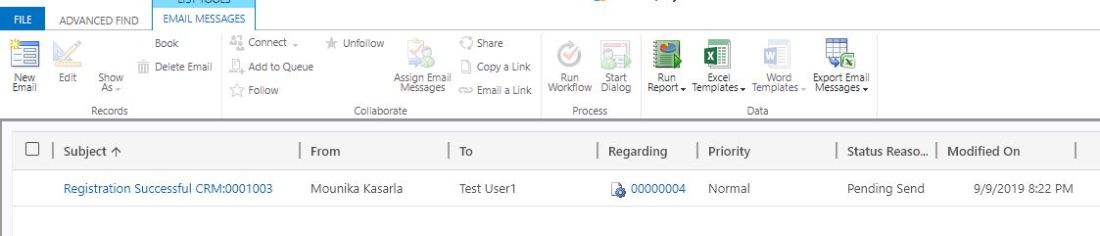
Step – 6: Go to Advanced find and search for Email Messages and click on results, You will see list of Email messages created by the system and select the relevant one and open
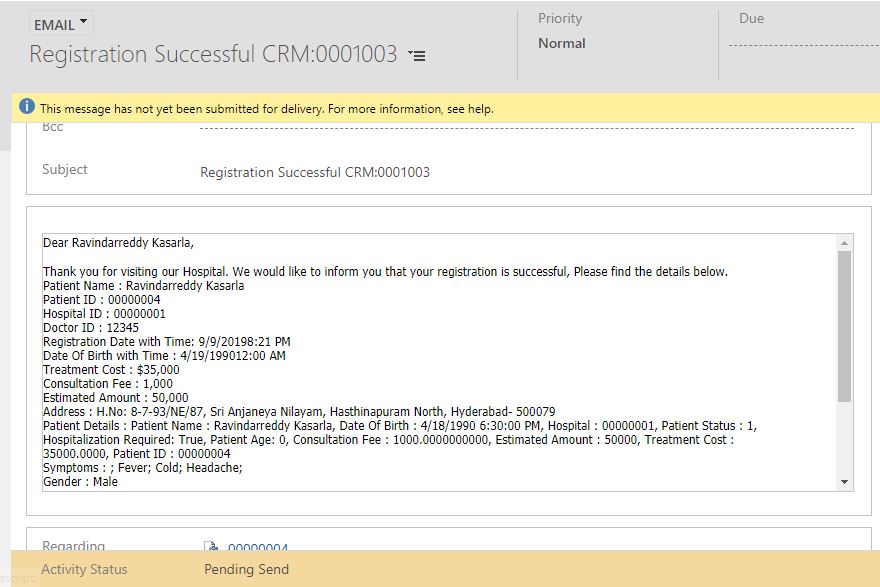
Here you go, your Patient Registration Email contains all the details which you have mentioned on the email template…!!!
*This post is locked for comments